

What is This?
This is a summarized set of notes for B1 – In Search of the Unknown by Mike Carr. You will need to purchase the full adventure here in order to take full advantage of this dungeon.
Background
Long ago, the renowned fighter Rogahn the Fearless and the mysterious magic-user Zelligar the Unknown built a hidden stronghold called the Caverns of Quasqueton, carved into a craggy, forested hill. This secret base took over a decade to construct with magic and labor, serving as their base for occasional adventures. Though their true motives were unclear, they gained widespread fame for decisively repelling a barbarian invasion, receiving considerable treasure that largely funded Quasqueton’s further development. Years later, they embarked on a final expedition into barbarian lands with most of their followers and never returned. Rumors suggest they met their end in a great battle, leaving their hidden stronghold and its potential riches ripe for discovery.
Key to the Upper Level
The upper level of the complex feels like a proper, finished abode. You’ll notice the stonework and masonry are generally good, with walls that are relatively smoothly hewn and in good repair. While there are a few rough spots or areas where the craftsmanship isn’t quite as meticulous, the overall construction and excavation are well done.
The floors, though uneven in places, are also in good condition. Corridors typically measure 10 feet wide, and the ceilings mostly range from 8 to 10 feet high. The distinctive blackish stone from which the halls and caverns were carved is evident throughout. All the doors are uniformly heavy wooden constructions, about five or six inches thick.
Entrance
What the GM can reveal immediately:
- A cave-like opening, somewhat hidden by vegetation, is at the end of a treacherous path leading up to a craggy black rock outcropping.
- Sweeping aside vines and branches reveals the opening, which leads into a 10-foot-wide corridor straight into the rock.
- The corridor ends at a large wooden door that opens freely.
What players need to investigate:
- Close examination of the wooden door reveals bits of wood chipped away from the edge, indicating it was previously forced (10% chance per adventurer, cumulative, to notice without specific examination; 40% for four adventurers).
1. Alcoves
What the GM can reveal immediately:
- Past the entrance, there are three pairs of empty, barren alcoves, designed for defense.
- At the end of the corridor, past the third pair of alcoves, are two steps up.
- At the top of the steps, the corridor continues straight, and corridors meet from east to west.
- At this intersection is a grisly sight: the remains of at least five combatants who died in a hand-to-hand battle.
- When adventurers reach the point between the third pair of alcoves, two magic mouths appear and speak:
- East mouth: “WHO DARES ENTER THIS PLACE AND INTRUDE UPON THE SANCTUARY OF ITS INHABITANTS?”
- West mouth: “ONLY A GROUP OF FOOLHARDY EXPLORERS DOOMED TO CERTAIN DEATH!”
- Both mouths: “WOE TO ANY WHO PASS THIS PLACE-THE WRATH OF ZELLIGAR AND ROGAHN WILL BE UPON THEM!”
- The mouths then laugh loudly before disappearing. They are a permanent feature.
- A strong, repulsive stench of decaying bodies fills the air, and the sight is equally repulsive.
What players need to investigate:
- The second pair of alcoves are secret one-way doors, unnoticeable from the corridor side, allowing guards to appear behind intruders.
- Examination of the bodies reveals:
- Three are adventurers (a human fighter, a human magic-user, and a dwarf fighter).
- Two are guards (human berserker/fighters).
- Body #1 (Human Fighter): Slumped against a wall, broken sword. Stripped of armor, no items of value except a belt pouch containing 5 gold pieces (g.p.).
- Body #2 (Human Magic-User): Impaled against a wall by a sword. Removing the sword makes the body crumple, revealing a blood-stained carving of the word “QUASQUETON.” The sword is worthless (loose handle, poor quality). Robe is bloodstained and ruined. Pocket contains a purse with 2 g.p. and a pouch full of garlic buds.
- Body #3 (Dwarf Fighter): Face down, clutching a war hammer. A trail of dried blood leads back to the battle. Stripped of armor, helm has a dent making it unusable and worthless. An empty, inside-out sack lies nearby.
- Body #4 (Human Guard): Sprawled on the floor, broken wooden shield nearby. No armor, weapon, or other items of value.
- Body #5 (Human Guard): Face down, bashed head. No armor or weapon, except a small sheathed dagger on an ornately decorated leather belt (bloodstained, ruining its appearance).
Monster:
- A Giant Centipede or two, lurking among the decaying bodies, drawn by the smell.
Treasure & Location:
- Body #1: 5 g.p. in belt pouch.
- Body #2: 2 g.p. and a pouch of garlic buds in a robe pocket.
- Body #5: A small, sheathed dagger on the guard’s belt.
2. Kitchen
What the GM can reveal immediately:
- A long room, likely a food preparation area.
- A small chimney leads upward.
- Long tables line each wall, with scattered, upturned containers and spilled, moldering contents.
- Spoiled food is scattered everywhere, creating a very uninviting smell.
- One chunk of moldy cheese is particularly noxious, covered in fuzzy green growth.
- Various cooking utensils hang from above or are scattered on the floor (pots and pans).
- A large cast-iron kettle hangs empty from the ceiling by a thick chain.
- Goblin Activity: A truly astonishing mess greets you. About four goblins are in a state of utter disarray, covered in flour, grease, and various food scraps. One is wildly stirring a bubbling pot on the fire with a broom handle, sending splashes everywhere. Another is cackling madly as he hurls a half-eaten loaf of bread at a companion who is currently wearing a pot as a helmet and trying to scoop something from a barrel with his bare hands. The floor is slick with spills, and several pots are overturned.
What players need to investigate:
- Chimney: The chimney is too small for further investigation.
- Goblins: These goblins are very drunk (-4 penalty to AC and attack rolls) and completely engrossed in their destructive “cooking.” They’re more likely to throw food at the PCs than to draw weapons, initially. Their chaotic actions could cause small hazards (slipping on the floor, getting hit by flying food/debris).
- Kitchen Contents: Most food stores are now ruined or scattered. The fireplace is roaring wildly, and the pot on it is dangerously close to boiling over.
Monster:
- 4 Drunk Goblins (HP 3-6 each, AC 9, MV 20′, ATK 1, DMG 1-6 with crude weapons, -4 to hit). Their loud and messy antics will be hard to miss.
Treasure & Location:
- Hidden in a loose stone in one of the cooking pits (requires searching): A small pouch containing 15 g.p. and 2 silver pieces (s.p.).
- On the person of the goblins: Each carries 1d4 copper pieces, along with pockets full of sticky, disgusting food scraps.
3. Dining Room
What the GM can reveal immediately:
- This room is the main dining hall, moderately but frugally decorated.
- A nicely carved wooden mantle runs around the room 7 feet off the floor.
- The stone walls have simple, pleasant carvings.
- Numerous utilitarian wooden tables and chairs are scattered about, several overturned, showing wear.
- Goblin Activity: The musty, mildewy smell is heavily masked by the overwhelming stench of stale wine, burnt food, and unwashed bodies. Six goblins are in the midst of a truly epic food fight. Half-eaten loaves of bread, greasy meat scraps, and what appears to be some kind of chunky gruel are splattered across the walls, tables, and floor. One goblin is gleefully attempting to catapult a mashed potato-like substance from a large serving spoon at another, who is hiding under an overturned table, giggling. A third is attempting to juggle three moldy apples, only to have them squish and splatter everywhere. The air is filled with their drunken shouts and the messy sounds of their battle.
What players need to investigate:
- Two ornately carved walnut chairs in the northeast corner are fixed seats, part of a wooden structure in the wall. They are beautiful but marred by greenish fungus, indicating disuse. These chairs are fixed and cannot be removed.
- Goblins: These goblins are thoroughly intoxicated (-4 penalty to AC and attack rolls). They are more interested in their food fight than in new arrivals, but a stray chunk of food, or a direct confrontation, could quickly draw their attention. They’re clumsy and loud, making them easy to surprise but also likely to attract other monsters.
Monster:
- 6 Drunk Goblins (HP 3-6 each, AC 9, MV 20′, ATK 1, DMG 1-6 with crude weapons, -4 to hit). Their antics make a significant amount of noise.
Treasure & Location:
- Concealed within a hollowed-out leg of one of the non-overturned wooden chairs (requires careful inspection and prying): A small, greasy leather pouch containing 12 s.p. and a tarnished silver fork (worth 2 g.p.).
- On the person of the goblins: Each carries 1d4 copper pieces, along with pockets full of sticky, disgusting food scraps.
4. Lounge
What the GM can reveal immediately:
- This anteroom, through a south door from the dining room, was likely for before- and after-dinner activities.
- Several earthenware tankard mugs hang from hooks high on one wall (many are missing).
- A dry ale keg, still smelling faintly of brew, stands in a corner.
- The stone walls have a strange texture but no other markings.
- Long wooden bench seats are attached to the walls, facing the center of the room.
- At the center of the room is a full-sized, nude human female statue of white marble in an alluring pose.
What players need to investigate:
- The white marble statue is obviously of great value (over 5,000 g.p.) but is too heavy and anchored to the floor to be removed without major engineering effort. Even characters with 18 Strength cannot move it.
Monster:
- None.
Treasure & Location:
- None, beyond the immovable statue’s inherent value.
5. Wizard’s Chamber
What the GM can reveal immediately:
- Zelligar’s personal chamber is austere.
- A very large, detailed stone carving runs most of the length of the north wall (about 70 feet long). It depicts a mighty wizard (Zelligar) casting a spell over a valley, with an army fleeing in panic.
- The east and west walls are bare but have several wall pegs for hanging garments.
- Minimal furniture: a bed, a nightstand, a table, and three chairs.
- On the table are a pewter pitcher and three pewter mugs.
What players need to investigate:
- Zelligar’s Bed: Located in the southeast corner. Frame of ornately carved rosewood with Zelligar’s name highlighted in gold leaf on the headboard. It’s valuable and of fine workmanship but sturdy and cannot be removed without dismantling, likely damaging it. If successfully dismantled without significant damage, the baseboard and sides are worth 100 g.p. each, and the headboard up to 500 g.p. Selling the headboard carries an 80% risk of the buyer recognizing Zelligar’s name, potentially leading to problems for the seller.
- Rosewood Nightstand/Table: Beside the bed, with one locked drawer.
- Pin Trap: Grasping the brass handle trips a pin trap, inflicting 1 hit point of damage. An oily substance on the pins causes unusual pain, making the grasping hand unusable for 2-5 (1d4+1) turns.
- Trap Negation: Inserting any key comparable in size to the actual (missing) key into the lock before grasping the handle negates the trap.
- The drawer is empty (unless you choose to place treasure here).
- The other table and three chairs are of no exceptional worth.
- Pewter Pitcher: On the table, worth 15 g.p.
- Pewter Mugs: Three on the table, worth 5 g.p. each.
Monster:
- A Ghoul (or two if the party is strong) could be lying in wait behind the large bed, animated by lingering magical energies or the desecration of the chamber.
Treasure & Location:
- Dismantled Bed: Baseboard and sides (100 g.p. each), Headboard (500 g.p.), subject to selling risks.
- On the table: Pewter pitcher (15 g.p.), 3 pewter mugs (5 g.p. each).
- Inside the nightstand’s locked drawer (if you choose to add): A Potion of Healing and 20 g.p.
6. Closet
What the GM can reveal immediately:
- This room is through a door on the south wall of Zelligar’s chamber. It’s large for a closet but mostly barren.
- Several dusty, partially moth-eaten, and deteriorated bolts of cloth are stacked in one corner (no value).
- Several musty, dusty, and dingy coats and cloaks hang on one wall.
- An oil lantern without fuel, unused for a long time, is along one wall.
- A small table in another corner has a stack of very dusty papers held down by a stone slab paperweight monogrammed with a fancy letter Z.
What players need to investigate:
- Remarkable Garment: Of the five pieces of apparel, one is studded with circular pewter bits for ornamentation. It’s aged but could sell for up to 15 g.p. The other four have no value.
- Books on a Wooden Stand: Four large, dusty volumes, apparently from the library (Room 12).
- Book #1: Historical work in Common, outlining history within 100 miles of the stronghold. Nothing remarkable.
- Book #2: Encyclopedia of plants, illustrations provide clues, but written in Elvish (requires “read languages” spell or Elvish knowledge to understand).
- Book #3 (Zelligar’s Diary): Appears unremarkable, a notebook with undecipherable runes. Actually Zelligar’s handwritten diary detailing a past adventure. Requires “read languages” spell to understand. No value to finder but a dealer/scribe/librarian might pay up to 50 g.p. Selling carries a 40% risk of rumor spreading, leading to problems for the seller.
- Book #4: Discusses weather, in Common, well-illustrated but sparse text. Cryptic marginal notes by Zelligar are undecipherable without “read languages” and are just student-like notes.
- Papers on Small Table: Written in Common, these deal with mundane matters: food inventory, financial accounting, construction notes, routine messages, etc. The most recent date is over three decades old. The stone slab paperweight itself has no special value beyond its monogram. One of the notes mentions the the laboratory (area 9), providing a clue to its existence.
Monster:
- A Giant Spider could be lurking in the dusty corners or behind the stacked cloth.
Treasure & Location:
- On the wall: One studded garment (up to 15 g.p. if sold).
- Wooden Stand: Zelligar’s diary (Book #3), worth up to 50 g.p. to a dealer.
- Hidden behind a loose stone in the back of the closet (requires thorough search): A small, locked wooden box containing 30 s.p. and a Scroll of Protection from Evil.
7. Wizard’s Annex
What the GM can reveal immediately:
- This room is unusually shaped, with a triangular widening at its south end, suggesting it was used for meditation, study, and spell practice.
- At the south end of the room, when light is cast in, you see a magnificent sight: two large wooden chests, each studded with jewels and overflowing with riches. A pile of gold pieces is arrayed around and within them, with an assortment of glittering gems and jewels scattered among the treasure.
What players need to investigate:
- The massive treasure is a permanent Illusion. The first time any “treasure” is touched, the illusion temporarily dispels, revealing an empty room. The illusion reappears within 24 hours.
- (GM knowledge): The stone wall near the south end is thicker than elsewhere (not noticeable without specific means), and the floor is bumpy and darkly discolored, as if charred and partially melted by intense heat (this only becomes noticeable once the illusion is dispelled).
Monster:
- None (the illusion is the primary feature here).
Treasure & Location:
- None (the illusion is designed to be a false lead).
8. Wizard’s Workroom
What the GM can reveal immediately:
- This room is designed for various magical studies and practices.
- Several large wooden tables are in the room, one overturned.
- A central stone table with a smooth, black slate top is covered by a thick layer of dust.
- Several chairs and stools are scattered about.
- Along the north wall, on either side of the door to the laboratory, are wooden cabinets approximately 4 feet off the floor. They are not locked.
- The cabinets contain various chemical compounds and supplies in glass or earthen containers. There are forty such containers.
- One larger clear glass jar is present, containing what appears to be a black cat’s body floating in a clear, colorless liquid.
What players need to investigate:
- Contents of Small Containers: If adventurers open and examine the small containers, a d20 roll determines the contents. Some contents may not be immediately identifiable; in such cases, a character’s Wisdom score multiplied by 5 gives the percentage chance of positive identification. Up to two characters can attempt to identify a substance, but if both fail, it remains a mystery.
- (DM will refer to the detailed table provided in the original text for specific contents and potential types).
- The Larger Jar: If the large cork lid is unstopped, the liquid instantaneously evaporates, and the cat springs to life, jumps out of the jar, meows loudly, and runs for the door. If the door is open, it dashes through and disappears. If the door is closed, it passes through the door and disappears. The cat will not be seen again and has no special meaning beyond surprising and mystifying the adventurers.
Monster:
- A Brown Mold patch growing on the overturned wooden table, which drains heat and can quickly freeze creatures.
Treasure & Location:
- Within a false bottom in one of the wooden cabinets (requires a successful Search roll DC 15): A pouch containing 10 g.p. and 3 small, clear quartz crystals (worth 1 g.p. each).
9. Wizard’s Laboratory
What the GM can reveal immediately:
- This 50′ by 30′ room is a strange and fascinating place, filled with Zelligar’s experimental equipment and devices.
- A large human skeleton, with a cracked skull, hangs from the ceiling in the northeast corner.
- Several large wooden tables and another heavy stone table, similar to those in the workroom, are bare except for a single stoppered smoked glass bottle on one of them.
- If the cork is removed from the smoked glass bottle, gas immediately issues forth with a whoosh. This is a pungent, fast-acting laughing gas. All characters within 10 feet must make an immediate save vs. poison or lapse into uncontrollable, raucous laughter for 1-6 melee rounds. Affected characters have a 50% chance of dropping anything they hold, rock with spasms, and stagger about. The noise necessitates a special check for wandering monsters, and affected characters cannot oppose them. A dispel magic spell ends the effect immediately.
- A large wooden rack, obviously sized for human bodies, with a trickle of dried blood staining its oak construction, stands along the west wall. It appears to be from a torture chamber.
- A sunken, blackened, and cold fire pit is the centerpiece of the room. It’s 2′ deep, with several inches of ashes inside.
- An iron bracing and bar across the 4′ wide opening suspend a cast iron pot, empty except for a harmless brown residue.
- Another shallower, similar pot lies on the floor alongside the pit, also empty. Both pots are extremely heavy and require great effort from two or more characters with 14+ Strength to move.
- In the southwest corner are two empty wooden vats, each with a 100-gallon capacity.
- A third vat nearby, half the size, is half-filled with murky, muddy water.
- A stone block next to the vats (along the west wall) serves as a table or stand. It has six earthen containers like those in the workroom.
- Pieces of glassware of various types are on the stone stand and floor; some are clean, some have residue, but all are empty and dusty.
- An empty, plain, and utilitarian wooden coffin rests upright in the northwest corner. It opens easily and is empty, with rotting wood in places.
- Two kegs rest against the north wall, similar to those in a storeroom, with letter codes to denote contents (determined as in Room 8).
- Wooden shelving on the north wall holds more glassware and three more containers (determined as in Room 8).
- Two small trays hold powdered incense of different colors, their aroma revealing their identity.
What players need to investigate:
- Human Skeleton: Were there a way to know, it would be discovered to be a barbarian chieftain’s remains.
- “Gold” Ring: Several pine logs are piled under one of the tables. If moved, a shiny “gold” ring will be found. It appears brilliant and worth up to 100 g.p. but is actually worthless and has no magical properties.
- Stretched Leather Skin: On the south wall, with magical writings that are undecipherable unless a read magic spell is cast. If interpreted, it reads: “What mysterious happenings have their birth here? Only the greatest feats of wizardry, for which every element of earth, water and sky is but a tool!” The skin is old and extremely fragile; any attempt to remove it will cause irreparable harm and render it useless as it crumbles away.
- Contents of Earthen Containers and Kegs: (Determined by d20 roll and Wisdom check as in Room 8).
Monster:
- A Stirge (or two) hiding in the rafters or high corners, attracted by any noise or movement.
Treasure & Location:
- Under a table: A worthless “gold” ring.
- In the bottom of the murky vat (requires careful sifting): 7 s.p. and a small, tarnished silver locket (worth 5 g.p., contains nothing).
- Within one of the additional containers on the wooden shelving (requires careful searching and identification): A vial of Sovereign Glue.
10. Storeroom
What the GM can reveal immediately:
- This irregularly shaped room is hidden by a secret door.
- It contains a bare fraction of its capacity in supplies.
- Approximately 60 barrels and casks are stacked in two locations: against the northwest wall and along the east wall in the southern portion.
- These containers are marked with letter codes.
- The contents are usable or edible but have an “off-taste” due to staleness.
What players need to investigate:
- Contents of Barrels/Casks: If a barrel or cask is chosen for examination and broken open, a d20 roll determines its code marking and contents (e.g., whole barley, wheat flour, salt pork, ale, honey, dried mushrooms, etc.).
- (GM Note): Any opened or spilled contents will attract vermin/monsters over time and spoil. This is relevant for multiple forays.
Monster:
- A Giant Rat or Dire Rat lurking within one of the stacks of barrels, ready to attack if disturbed.
Treasure & Location:
- Hidden beneath a loose floorboard near the west stack of barrels (requires a successful Search roll DC 13): A small, waxed canvas bag containing 18 g.p. and a silver signet ring (worth 10 g.p., depicts a stylized raven).
11. Supply Room
What the GM can reveal immediately:
- The stronghold’s supply room is rather empty, containing mostly construction supplies.
- Visible materials include:
- A coil of very heavy rope, 200 feet long.
- A box of 50 iron spikes.
- A box of metal nails.
- A pile of 80 wooden beams, each 10 feet long and 6″x6″.
- An almost empty sack of building mortar.
- A stack of 400 stone blocks, each about 6″x6″x12″.
- Six wooden doors, leaning in a row against a wall.
- A large box of assorted hardware (locks, hinges, clasps, hasps, handles, bolts, etc.).
- A jug of dried glue.
What players need to investigate:
- The box of assorted hardware could yield useful items like locks or hinges if meticulously searched.
Monster:
- None.
Treasure & Location:
- Inside the box of assorted hardware (requires sifting through everything): A small, tarnished copper key (worth 1 g.p., could unlock a future door) and 5 small, intricately carved wooden figurines (worth 2 g.p. each if cleaned and sold).
12. Library
What the GM can reveal immediately:
- The library is behind a pair of ornately carved oaken doors.
- The floor is covered in dust, but beneath is a beautiful, shiny surface of polished red granite inlaid in large blocks.
- In the center of the room, white granite blocks within the red stone form the letters “R & Z”.
- Three large oaken tables are present (one in each of the west, north, and east wings).
- Several wooden chairs are scattered about.
- Two plush, fleecy upholstered divans are in two corners, dusty and dingy but comfortable for reclining.
- Wall sconces for torches are mounted around the room.
- Small cages are inset into the north wall, containing numerous fire beetles. These insects emit an eerie, glowing reddish light, illuminating that portion of the room. The light appears forbidding and mysterious from the entrance. The insects seem to thrive, but their food source and longevity are puzzling.
What players need to investigate:
- There is no way to open or force the fire beetle cages.
- The library is modestly supplied with books, volumes, tomes, and a few scrolls in a rack along the east wall. None are of any particular use or special interest to adventurers, regardless of how many are examined.
Monster:
- A Large Spider (or two Giant Spiders) could be lurking amongst the dusty shelves or behind the divans, drawn to the quiet and potential prey.
Treasure & Location:
- Tucked inside a loose panel in the back of one of the oaken tables (requires thorough examination and prying): A small, flat wooden box containing a silver holy symbol (worth 20 g.p.) and a leather-bound journal (empty, but fine quality, worth 5 g.p.).
13. Implement Room
What the GM can reveal immediately:
- This elongated room is used for storing tools, equipment, and implements.
- Visible items include: a box of wooden pegs, a 50′ coil of light rope, a 70′ coil of heavy chain, a 20′ coil of fine copper wire, 32 unusable and poorly repaired mining picks, 15 chisels, 13 shovels, 11 empty barrels, 8 mallets, 29 iron bars (1″ diameter, 8′ length each), a 12″ iron vise, 2 broken mining jacks, 2 two-man crosscut saws, 4 hacksaws, a mason’s toolbox, a cobbler’s toolbox, and a small barrel of 60 normal unfletched arrows.
- An empty wooden bench, 10′ long, is also present.
- On the north wall, fairly well concealed, is a counterweight mechanism for a portcullis trap in the corridor outside this room, along with a lever to raise it.
- The portcullis trap is in the corridor outside the door, just beyond it to the east. It springs when one or more adventurers reach a point 10′ in front of the dead-end wall, dropping noisily 20′ behind that point.
- The portcullis bars are rusty and weak, with twelve vertical bars and several crossmembers.
What players need to investigate:
- Portcullis Lever: No more than two individuals (men/dwarves/elves, etc.) can attempt to use the lever at a time. Their combined Strength must total at least 30, giving a 20% chance to raise the portcullis, plus an additional 5% for each point beyond 30. Each combination can attempt this once.
- Thieves’ Chance: Thieves at the front of the party can attempt to “remove trap” to discover and alert the party without triggering it, if they are the first to reach the trigger point.
- Bending Bars/Lifting Gate: Very strong characters can attempt to escape the trap (one attempt per person).
- Strength 13-15: 5% chance.
- Strength 16: 10% chance.
- Strength 17-18: 15% chance.
- Sawing Through Portcullis: Using the hacksaws to cut through the portcullis:
- 1 saw: 24 hours.
- 2 saws: 18 hours.
- 3 saws: 12 hours.
- 4 saws: 6 hours (max one saw per person).
- Sawing creates noise, potentially attracting wandering monsters. Each saw blade has a 20% chance of breaking every 6 hours (no extra blades).
Monster:
- A Rust Monster could be attracted by the metal tools and portcullis, making the tools and escape attempts more challenging. It might be hidden among the iron bars or under the workbench.
Treasure & Location:
- Hidden within the mason’s toolbox (requires careful search): A small, flat leather pouch containing 10 s.p. and a small, uncut sapphire (worth 50 g.p.).
- Concealed inside one of the empty barrels (requires checking each one): A forgotten, mostly full waterskin.
14. Auxiliary Storeroom
What the GM can reveal immediately:
- This extra storeroom is empty of goods and supplies.
- In one corner, there is a pile of rock rubble.
What players need to investigate:
- The pile of rock rubble is just that—rubble. There’s nothing hidden within or under it.
Monster:
- None.
Treasure & Location:
- None.
15. & 16. Teleportation Rooms
What the GM can reveal immediately:
- These two rooms are of equal size and shape, affected by a strong, permanent teleportation magic designed to confuse.
- Both rooms function identically once their doors are opened.
- In each room, in the corner farthest from the door, is a shiny, sparkling crystalline rock outcropping that dazzles when light reflects off it. The outcroppings are identical in both rooms.
- Once adventurers enter to investigate the outcropping, the entire party is instantly teleported to the identical location in the other room, without noticing the teleportation. They will still believe they entered through the original door (e.g., if Room 15 was entered, they’ll believe they came from the east wall; if Room 16 was entered, they’ll believe they came from the south wall).
- (GM Note): The DM should turn their map to correspond to the players’ perceived directions. When players emerge and find external details don’t match their map, they will become confused. The DM should avoid argument and simply state the new reality, letting players figure it out.
- Once triggered, the teleportation won’t occur again until the room is empty and the door closed from the outside. It reactivates when the door is opened and the room entered.
- The door of the receiving room will always appear exactly as the door of the first room entered.
- Doors in both rooms automatically close and “ready” themselves once all adventurers are at least 120′ away down any corridor.
- It’s possible for a party to trigger the trick, be teleported, blunder back into the original room, realize they are identical but in different locations, and discover the trick. Or they could become completely confused.
What players need to investigate:
- The nature of the teleportation effect can only be discovered through observation of inconsistencies in mapping or by intentionally re-entering the rooms multiple times.
Monster:
- None recommended for these rooms.
Treasure & Location:
- None recommended for these rooms.
17. Char Storage Cellar
What the GM can reveal immediately:
- This 20’x20′ room is used for storing fuel for the smithy across the hallway.
- The room is full of blackish soot and dust, but only a small pile of fuel (charcoal/coal) rests against the north wall.
- There is a false door on the west wall.
What players need to investigate:
- False Door: It cannot be opened, though it will rattle slightly when great strength is applied, indicating it rests in a frame.
Monster:
- A Giant Rat or Cave Beetle could be burrowed in the pile of fuel or soot, scuttling out if disturbed.
Treasure & Location:
- Concealed within a hollowed-out section of a large charcoal lump (requires careful splitting of larger fuel pieces): A small, heavy iron box (unlocked) containing 10 g.p. and 2 small garnets (worth 5 g.p. each).
18. Smithy
What the GM can reveal immediately:
- The smithy is an irregularly shaped room, appearing almost as two separate parts.
- An eerie wind whistles through the upper areas near the ceiling, which provided natural exhaust when fires were stoked.
- Three dormant fire pits are in the northeast 20’x20′ portion: on the north wall, in the northeast corner, and on the east wall.
- A gigantic forging anvil stands in the center of this section.
- A hand bellows hangs on the west wall.
- The larger southwest portion is mostly barren, though an assortment of blacksmith’s tools and irons hang on the walls.
What players need to investigate:
- The tools and irons on the walls are mostly mundane blacksmithing equipment, though they might be useful for certain tasks.
Monster:
- A Grey Ooze might be clinging to the underside of the large anvil, disguised as rust or grime, attacking if disturbed or if metal is placed on the anvil.
Treasure & Location:
- Tucked behind the bellows (requires moving it): A masterwork hammer (counts as +1 to hit for anyone proficient with hammers, otherwise normal, worth 50 g.p. to a collector).
- Under a loose stone near the northeast fire pit (requires searching): 5 s.p. and a small, unstrung brass locket (empty, worth 2 g.p.).
19. Access Room
What the GM can reveal immediately:
- This room adjoins the smithy and provides vertical access to a lower level.
- In the northeast corner, along the north wall, are stacked log sections of various sizes (8″-24″ diameter, 1′-4′ length), appearing as fuel for the blacksmith’s fires. The room is otherwise empty.
- In the southeast portion, there’s a large hole in the floor, about 3′ across.
- If a light source (like a torch) is cast down the hole, it comes to rest on the lower level’s floor, approximately 40′ down.
- A large iron ring is anchored to the south wall near the hole.
What players need to investigate:
- Iron Ring for Descent: If a rope is fastened to it, it can assist descent. However, the fastening is loose. Each person using the rope has a 1 in 6 chance (non-cumulative) of pulling the ring out, causing them and the rope to fall (1-4 hp damage). This chance increases to 2 in 6 for heavily encumbered individuals (500+ coins weight). Once removed, the ring cannot be replaced.
- Alternative Descent Methods:
- Log and Rope: Adventurers can use a 4′ log from the pile, tie a rope around it, place it across the 3′ opening, and climb down.
- Rope Length: Any rope for descent must be at least 30′ long. For return (reachable from below), it needs to be at least 35′ long.
- Grapple: A rope and grapple can be used, anchored to the iron ring or either doorway (south doorway adds 10′ to required length, north doorway adds 20′).
Monster:
- A Giant Centipede could be clinging to the inside of the shaft, ready to drop on anyone attempting to descend without caution.
Treasure & Location:
- Tucked behind a loose log in the woodpile (requires moving logs): A small leather pouch containing 3 electrum pieces (e.p.) and a flint and steel set.
20. Dead End Room
What the GM can reveal immediately:
- A winding corridor leads to this dead-end room.
- The walls are unfinished, suggesting this area was reserved for future development.
What players need to investigate:
- Nothing conclusive can be found here.
Monster:
- None.
Treasure & Location:
- None.
21. Meeting Room
What the GM can reveal immediately:
- This long and narrow room appears to be an auditorium or meeting room.
- Ten wooden benches, each about 15 feet long, are scattered about.
- A large stone slab at the north end of the room serves as a stage, rising 10 inches off the floor.
- On the north wall are four decorative cloth banners (red, green, blue, yellow) that are deteriorated and rotting.
What players need to investigate:
- The banners, while once attractive, are now worthless due to their condition.
Monster:
- A Giant Bat or two, disturbed by the party’s entrance, could swoop down from the ceiling.
Treasure & Location:
- Concealed beneath the largest stone slab (requires significant effort to move): A small, crude wooden box containing 12 s.p. and a tarnished bronze medallion (worth 5 g.p., depicts a stylized tree).
22. Garden Room
What the GM can reveal immediately:
- This room was once a showplace but has become a “botanical nightmare” of overgrown molds and fungi.
- The room has two major portions: a north arm and a west arm.
- Large semi-circular stone formations, overgrown with fungoid matter, are at the end of each arm.
- Another similar outcropping, also covered with “underground vegetation,” is in the southeast corner.
- Two large sunken pits, each 10′ x 20′, are in the center of the northern wing.
- Approaching from the south corridor, unusual growths extend into the corridor itself, spreading from within the room.
- Entering the room reveals a sight unlike anything in the outside world.
- The floor, walls, and even parts of the ceiling are covered with a carpet of tufted molds in a rainbow assortment of clashing colors (splotches, clumps, swirls, patches), creating a “fuzzy fairyland.”
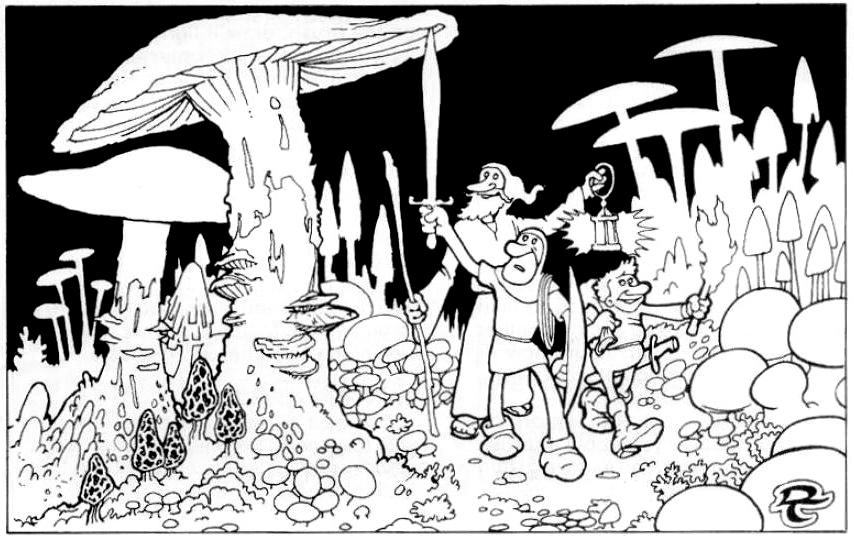
- Fungi of a hundred different kinds are scattered in patches and clumps throughout the room, including giant mushrooms (stems like tree trunks, caps 8′ in diameter), shelf types, giant puffballs, coral fungi, and morels.
- All growths appear to be thriving, despite their nutrient source being covered, suggesting strange magic or extraordinary means keep them alive.
- Movement through the room is hindered by the growths.
- Any mass movement or commotion (like a melee) raises small clouds of spores that obscure vision and are unpleasant to breathe.
What players need to investigate:
- Ingesting Fungi: If any adventurer attempts to ingest a specific type of fungus, there’s a 30% chance it’s poisonous (requires a successful save vs. poison).
- The actual source of sustenance for the thriving fungi is covered by their proliferation.
Monster:
- A Shrieker mushroom (a large, sensitive fungus that emits a loud shriek when disturbed, attracting wandering monsters) could be located near one of the sunken pits.
- 1-2 Yellow Mold patches, disguised among the other fungi, could release toxic spores if touched or disturbed.
Treasure & Location:
- Hidden in the largest “giant mushroom” cap (requires climbing or reaching into it): A small, water-stained leather pouch containing a handful of dried, edible mushrooms (safe to eat, provide minimal sustenance) and 2 small, smooth river stones (no value).
- At the bottom of one of the sunken pits (requires descending and searching through ash/detritus): A crude, tarnished silver ring (worth 5 g.p.).
23. Storage Room
What the GM can reveal immediately:
- This room is used primarily for furniture storage, but it is mostly empty.
- Three large oaken tables, a number of chairs, and fourteen wooden stools are stacked against the walls.
- In the corner opposite the door, there’s a woodworking table with a crude vise attached.
- Small saws and other carpenter’s equipment are on the woodworking table.
- Wood chips and sawdust are scattered about the floor.
What players need to investigate:
- The woodworking table and tools are mundane, though potentially useful for repairs or crafting simple items.
Monster:
- A Giant Ant scout (or two) could be foraging for wood scraps, becoming aggressive if threatened.
Treasure & Location:
- Inside a small, hidden compartment on the underside of the woodworking table (requires a successful Search roll DC 14): A small, steel-bound strongbox (unlocked) containing 10 g.p. and a set of finely crafted small tools (e.g., jeweler’s tools, lockpicks for a thief, or similar, worth 25 g.p.).
24. Mistress’ Chamber
What the GM can reveal immediately:
- This room is more tastefully decorated than other living quarters in the stronghold, serving as the personal chamber of Rogahn’s mistress. She is long gone.
- A large, ornately carved walnut bed (resembling Zelligar’s but without a name) is against the west wall.
- The bed has a large, dusty canopy of embroidered green cloth with reddish trim.
- Next to the bed is a small table/nightstand with a single drawer.
- Beside it, against the wall, is a red cedar chest of drawers, which still has its characteristic smell despite its age.
- On top of the chest is an empty tortoiseshell dish, containing a single gold piece coin, resting on a frilly lace cloth with two small capped bottles half full of perfume.
- On the north wall, west of a secret door, is a large full-length wall mirror in a wooden frame. The frame’s crown is carved with attractive curving designs.
- An inscription in Common is hewn into the finished wood of the mirror frame: “To the fairest of all in my eyes.”
- In the northwest corner, there’s an attractive water basin sculpted directly from the wall rock, forming an integral protrusion. A rotting cork stops a hole in its bottom, draining water to an inclined rock piece and into a wall crack (no running water).
- A small 3’x4′ tapestry hangs on the east wall, depicting a handsome warrior rescuing a maiden from a burning village with ominous enemies watching. Embroidered in gold cloth at the top: “Melissa, the most dearly won and greatest of all my treasures.”
- The tapestry is in a wooden frame and firmly anchored to the wall.
What players need to investigate:
- Nightstand Drawer: The drawer is likely empty, or you could place a mundane personal item here.
- Chest of Drawers: Contains an assortment of leather items, old clothing, and personal effects (combs, brushes, hairpins). One comb is a silver-plated item worth 5 g.p.
- Tapestry: Cannot be removed without damaging it, in which case it only carries a value of 40 g.p. (presumably it would be worth more undamaged, but it’s permanently affixed).
- Secret Door: (GM note: The text mentions a secret door on the north wall, west of which the mirror hangs, but doesn’t explicitly describe its discovery). This secret door would lead to another area.
Monster:
- None.
Treasure & Location:
- On top of the chest of drawers: 1 gold piece (g.p.) in the tortoiseshell dish.
- Inside the chest of drawers: A silver-plated comb (5 g.p.).
- (Optional, in the nightstand drawer or a hidden spot in the bed frame): A small vial of fine, unspoiled perfume (worth 10 g.p.).
25. Rogahn’s Chamber
What the GM can reveal immediately:
- Rogahn’s personal quarters are simple and spartan, reflecting a utilitarian taste.
- The curving walls are unique, covered with vertical strips of rough-finished fir wood planks running from floor to ceiling. The construction is pleasing to the eye.
- In each of the four curved corners of the room is a different wall hanging (tapestry), each 6′ wide and ~8′ high.
- Subject 1: A dragon being slain by warriors, with one prominent warrior (Rogahn) thrusting a sword into its neck.
- Subject 2: A great battle in a mountain pass, with a small band led by a wizard (Zelligar) and a single hero (Rogahn) routing an army.
- Subject 3: A warrior (Rogahn) and a maiden (Melissa) on horseback, holding hands with joyful expressions against a mountain backdrop.
- Subject 4: A hero (Rogahn) and a wizard (Zelligar) joining in a firm handclasp on a deserted hilltop at sunset.
- Opposite a secret door on the west wall is a maple bed with a feather mattress. The baseboard has an engraved letter “R” but is otherwise plain.
- A free-standing wooden cabinet (matching the bed) is alongside the bed.
- A wooden stool is near the cabinet. No other furniture.
What players need to investigate:
- Fir Wood Walls: Removing any wood reveals only back bracing and the rock surface wall, no hidden passages or items.
- Tapestries: If removed, they are heavy (600 g.p. weight each) and bulky. Each is worth 100 g.p.
- Cabinet Contents: Contains general use garments: cloaks, a leather vest, a buckskin shirt, a metal corselet, and a pair of boots. None are of exceptional value.
- Secret Door: (GM note: The text explicitly mentions a “secret door on the west wall” that the bed is opposite, implying its existence as a pathway to another area).
Monster:
- None.
Treasure & Location:
- Tapestries: Four tapestries, each worth 100 g.p. if removed. (Total 400 g.p. but heavy and bulky).
- Hidden inside the feather mattress (requires tearing it open): A small, iron-bound box (unlocked) containing 3 gold nuggets (worth 10 g.p. each) and a small, well-preserved piece of dried jerky.
26. Trophy Room
What the GM can reveal immediately:
- This room contains an assortment of curiosities accumulated over the years.
- Most of the north wall is covered by an immense dragon’s skin with bright, brassy scales.
- At the west end of the room is a basilisk frozen in stone, its menacing gaze no longer a threat.
- On the east wall is a dwarven skeleton, suspended from irons near the ceiling, giving the chamber a macabre presence.
- Other mementos on the walls include: two gigantic sets of moose antlers on large heads, four dragon paws with extended claws, a stuffed cockatrice, a largish black shield (only usable by a giant), a pair of ram’s horns, a pair of crossed swords, a bearskin, an entire door bearing religious symbols, and a set of three colorful flags belonging to prominent barbarian tribes.
What players need to investigate:
- The dragon’s skin, basilisk, and dwarven skeleton are decorative trophies and not active threats.
- The black shield is too large for normal human-sized characters.
- The flags are recognizable to those with knowledge of barbarian tribes, but their significance or value is not immediately apparent beyond being mementos.
Monster:
- None.
Treasure & Location:
- Hidden behind the largest moose antlers (requires careful prying/removing antlers): A small hidden niche containing a silver dagger (worth 15 g.p., but otherwise mundane).
- Behind the hanging bearskin (requires moving it): A small, sturdy wooden case (unlocked) containing a handful of rare, dried herbs (worth 20 g.p. to an alchemist or sage).
27. Throne Room
What the GM can reveal immediately:
- This throne room is mostly for show, consisting of two great chairs on a raised stone platform.
- The platform overlooks a rectangular court flanked by four large stone pillars on each side.
- The area is reminiscent of a small ballroom, though its actual purpose is unclear.
- The floor is smooth slate, and the pillars and raised platform are constructed of great blocks of red granite.
- The two chairs are sculpted from gigantic blocks of white marble and are permanent fixtures due to their bulk and weight.
- Great draperies in alternating panels of yellow and purple hang on the wall behind the raised platform.
What players need to investigate:
- The draperies are of no unusual value, despite their appearance.
- The chairs are immovable.
Monster:
- A Gargoyle could be disguised as a decorative element on one of the pillars, becoming active if the party spends too much time or tries to tamper with the thrones.
Treasure & Location:
- Beneath one of the decorative draperies (requires pulling it aside and searching the wall): A concealed cubbyhole containing a small, intricately carved wooden box (unlocked) holding 15 g.p. and a small, polished piece of obsidian (worth 1 g.p.).
28. Worship Area
What the GM can reveal immediately:
- This room appears to be a token worship area.
- On the back wall, opposite the door, is a rock carving of a great idol sculpted from the wall itself. The image is a horned head with an evil visage (about 4′ wide, 6′ high), surrounded by religious symbols and runes.
- The floor is smooth black slate.
- In the center of the room is a circular depression, or pit, 5′ across and sloping to a maximum depth of 3′. This “sacrifice pit” is open and mostly empty, except for a small quantity of residual ash covering the bottom.
What players need to investigate:
- The idol is part of the wall and cannot be moved or harmed.
- The residual ash in the pit is mundane.
Monster:
- A Shadow (if the party is higher level/experienced) or a Ghoul could be lurking in the shadowed corners, drawn by the lingering dark energies of the worship area.
Treasure & Location:
- Buried within the residual ash at the bottom of the sacrifice pit (requires sifting through it): A tarnished copper amulet (worth 2 g.p.) and a single, unusually heavy iron coin (worth 1 g.p., but could be misidentified as a normal copper piece).
29. Captain’s Chamber
What the GM can reveal immediately:
- This is the simple room of Erig, Rogahn’s friend and comrade-in-arms, with few furnishings.
- The door is a large wooden construction with an irregular-shaped leather skin covering studded with circular brass bits forming the word “ERIG” prominently.
- The room itself is rather barren.
- In the southeast corner, there’s a crude bed and a table.
- On top of the table are a small stoneware crock with a cover, a large earthenware tankard mug, and a small hand mirror.
- On the south wall is a locked wooden chest.
- In the northeast corner, a wooden keg stand holds a single barrel, marked “SD,” full and untapped.
- On the western wall, numerous pegs and brackets for arms and armor are mostly empty, except for two shields and a heavy mace.
What players need to investigate:
- Stoneware Crock: Contains 5 g.p.
- Locked Wooden Chest: If opened (requires a thief’s tools or forced entry):
- Contents: Several garments (pants, cloaks, heavy cloth coat, two pairs of boots).
- At the bottom, underneath the clothing: A broken dagger.
- A leather pouch: Contains a walnut plaque with an inlaid silver piece engraved with “To Erig, great and trusted fighter by my side, and captain of the guard at Quasqueton—against all foes we shall prevail!” Signed with an embellished “R.” This plaque is worth up to 25 g.p. if sold.
- Barrel: Marked “SD,” indicating Ale (as per Room 10’s table). It’s full and untapped. If broken open, ale will issue forth.
- Shields and Mace: The two shields and heavy mace are standard equipment, potentially usable if characters are proficient.
Monster:
- None.
Treasure & Location:
- On the table: 5 g.p. in the stoneware crock.
- Inside the locked chest: Walnut plaque (25 g.p.), and a broken dagger.
- On the wall: Two shields and a heavy mace.
30. Access Room
What the GM can reveal immediately:
- This room is devoid of detail or contents.
- It provides access to a lower level of the stronghold via a descending stairway.
- This stairway leads directly down into Room 38 on the lower level.
What players need to investigate:
- Nothing else to investigate in this room.
Monster:
- None.
Treasure & Location:
- None.
31A. The Shimmering Pool Room (Pools A, I, M)
What the GM can reveal immediately:
- This room features a beautiful mosaic tile floor.
- You see three circular pools, each about 10 feet in diameter with sloping sides reaching a 5-foot depth.
- Pool A (Healing): Contains a strange, pinkish liquid.
- Pool I (Aura): Contains shimmering water that glistens and sparkles. It appears less full than other pools.
- Pool M (Treasure): Filled with normal water, but a pile of gold pieces and sparkling jewels appears to lie at the bottom.
What players need to investigate:
- Pool A (Healing Pool):
- Ingesting the pinkish liquid provides instantaneous healing (1-6 HP restored) and cures disease, but it won’t restore HP from disease. This effect works only once per person per day.
- The liquid loses its healing properties immediately upon removal from the room.
- (GM knowledge): This pool magically disappears and reappears. There’s only a 30% chance the liquid will be present on subsequent visits, though it’s always there on the first.
- Pool I (Aura Pool):
- The shimmering water tastes normal.
- Detect Magic spells reveal it radiates magic.
- Drinking even a single sip causes a tingling sensation, and an aura of color glows around the drinker for about a minute. The color corresponds to the drinker’s alignment (blue for lawful, yellow for chaotic, white for neutral). Players will initially be puzzled by the colors.
- The water retains its magical properties even if removed from the pool, but only 10 suitable drinks are available due to the small quantity.
- (GM knowledge): Like the Healing Pool, this pool disappears and reappears magically (30% chance of reappearance on future visits).
- Pool M (Treasure Pool):
- The visible gold and jewels are a magical illusion.
- The illusion dispels as soon as the water’s surface is broken or disturbed.
- The illusion reappears once the waters are calm again.
Monster:
- 1 Ochre Jelly: This amorphous creature (HP 12-24, AC 6, MV 30′, ATK 1, DMG 2-12, save F1) could be subtly camouflaged against the golden-brown mosaic floor, appearing as a particularly shiny or wet patch until disturbed. It won’t actively block the pools but will attack if approached or if treasure/water is disturbed. It’s immune to most non-magical slashing/piercing damage (splits when hit by such), but susceptible to blunt force or magic.
Treasure & Location:
- Pool M: The “treasure” is an illusion; there is no actual treasure here.
- Pool A and I: The liquid in these pools provides a beneficial magical effect, but is not treasure that can be permanently taken.
31B. The Potent Pool Room (Pools B, C, F, J)
What the GM can reveal immediately:
- This room also features the striking mosaic tile floor.
- You observe four circular pools, each 10 feet in diameter with sloping sides reaching a 5-foot depth.
- Pool B (Acid): Filled to the brim with a clear, fizzing liquid that gives off an unpleasant aroma.
- Pool C (Sickness): Filled with a murky gray syrup.
- Pool F (Wine): Filled with a deep red liquid.
- Pool J (Sleep): Contains a greenish liquid of varying shades, with a swirling pattern on its stagnant surface.
- Goblin Activity: The air is thick with the stench of cheap wine and unwashed goblin. Several crude, empty wineskins litter the floor around Pool F. Three goblins are in the room, clearly very drunk. One is attempting to juggle with a pickaxe and two rusty shields, occasionally dropping them with a clang. Another is singing a raucous, off-key song at the top of its lungs, while the third is trying to fish something out of the acid pool (Pool B) with a broken spear, giggling maniacally.
What players need to investigate:
- Goblins: These goblins are so inebriated they have a -4 penalty to AC and attack rolls, and are likely to react unpredictably. They might perceive the PCs as new playthings, more wine, or vaguely threatening shapes. If attacked, they’ll fight clumsily and loudly. The goblin trying to fish in the acid pool is in imminent danger of falling in or splashing itself.
- Pool B (Acid Pool):
- The liquid is acidic and deadly. Falling or leaping in results in immediate death.
- Touching it with a hand or body part causes 2-5 HP damage (1d4+1). Greater exposure causes more damage.
- Drinking even a sip causes immediate gagging and at least 5 HP damage, plus a save vs. poison to survive.
- A drop or two on the tongue causes 1 HP loss and gagging/choking for two melee rounds, no save needed.
- Weapons/objects dipped in it deteriorate (marked, weakened, warped, cracked), potentially ruining them completely (DM’s discretion, roll a die for effect).
- The acid eats through any container within two melee rounds.
- A single, seemingly unaffected large brass key (6 inches long) is visible at the bottom. It is worthless and does not fit any stronghold locks.
- Pool C (Sickness Pool):
- The murky gray syrup has a sweet taste if a drop is placed on the tongue, but causes no immediate symptoms.
- If consumed (even a sip), the victim suffers sickness six turns (one hour) later. No HP loss, but severe, recurring stomach pains for 1-4 hours, making fighting and movement impossible (though the victim can be carried). Symptoms then pass.
- Weapons or other items are unaffected by the liquid.
- Any liquid removed from the pool loses its special properties within three melee rounds.
- Pool F (Wine Pool):
- The deep red liquid is excellent wine.
- Anyone tasting it has a 60% chance (regardless of player wishes) of drinking more until intoxicated.
- To check for intoxication, roll 3d6. If the result is greater than the character’s Constitution, the difference is the number of hours the character is intoxicated.
- Intoxicated characters suffer: -2 on all “to hit” rolls in combat, -3 to Dexterity, and other DM-deemed disadvantages (loud speech, stumbling, increased surprise chance).
- Effects wear off after the allotted hours. An intoxicated character returning to this pool has a 90% chance of drinking too much again.
- Wine removed from the room immediately loses potency and becomes weak, normal wine.
- Pool J (Sleep Pool):
- The greenish liquid has a fruity taste if a drop is placed on the tongue, with no immediate effects.
- A sip induces drowsiness, with a 50% chance of immediate sleep lasting 1-6 minutes.
- Drinking a greater volume induces a comatose slumber for 1-8 hours (no saving throw).
- Liquid removed from the room loses effectiveness. Removing a consumed victim won’t awaken them.
Monster:
- 3 Drunk Goblins (HP 3-6 each, AC 9 (due to drunkenness), MV 20′, ATK 1, DMG 1-6 with crude weapons, -4 to hit).
Treasure & Location:
- Pool B (Acid Pool): The brass key is worthless. No actual treasure.
- Hidden within a crack in the mosaic tiles beneath Pool F (requires careful search and prying): A small, water-resistant leather pouch containing 7 silver pieces (s.p.) and 3 electrum pieces (e.p.).
- On the person of the goblins: Each carries 1d4 copper pieces.
31C. The Enigmatic Pool Room (Pools D, G, H, L)
What the GM can reveal immediately:
- This room also features the striking mosaic tile floor.
- You find four circular pools, each 10 feet in diameter with sloping sides reaching a 5-foot depth.
- Pool D (Green Slime): The horrid green slime is immediately obvious, covering the basin walls from bottom to edge.
- Pool G (Dry): This depression is completely dry, with no trace of liquid.
- Pool H (Hot): This is a steaming, bubbling cauldron of boiling water. A whitish crust of minerals is built up around the edge.
- Pool L (Ice): This basin is filled with steaming dry ice, appearing as a whitish rock giving off eerie vapors, and surprisingly, feeling hot to the touch.
What players need to investigate:
- Pool D (Green Slime Pool):
- This is Green Slime (HP: 20, AC 9, MV 3′, ATK 1, DMG special: transforms organic matter into slime). Highly dangerous, direct contact immediately converts organic material into slime.
- Pool G (Dry Pool):
- The basin is made of yellowish ceramic but is impervious to striking, cracking, or fracturing. No clues about its past contents.
- Pool H (Hot Pool):
- The water is boiling and has a high mineral content, but is otherwise normal.
- Pool L (Ice Pool):
- The “ice” never seems to dissipate despite steaming.
- If pieces are broken off and removed, they dissipate into carbon dioxide gas like normal dry ice.
- Pieces can be handled with a gloved hand, but the substance’s true nature will likely remain a mystery to characters who have never encountered dry ice.
Monster:
- 1 Giant Spider: (HP 5-10, AC 7, MV 60′, ATK 1, DMG 1-3 + poison) Could be hiding in a shadowed corner of the room, perhaps having captured smaller creatures that have wandered in. It might have spun a nearly invisible web across a less-used path.
Treasure & Location:
- Hidden within a secret compartment underneath the brim of the Dry Pool (Pool G – requires a very thorough search DC 16 and a strong prying tool): A small, ornate silver locket (worth 15 g.p., empty).
31D. The Natural Pool Room (Pools E, K, N)
What the GM can reveal immediately:
- This room also features the striking mosaic tile floor.
- You find three circular pools, each 10 feet in diameter with sloping sides reaching a 5-foot depth.
- Pool E (Drinking): Filled with icy cold spring water.
- Pool K (Fish): Contains normal lake water with numerous small fish.
- Pool N (Muting): Almost empty, with a small amount of water remaining.
What players need to investigate:
- Pool E (Drinking Pool):
- The water is pure, good, and refreshing, but has no other special characteristics.
- Pool K (Fish Pool):
- The fish are normal and the pool has no special properties.
- Pool N (Muting Pool):
- The liquid appears to be normal water with no unusual odor or taste.
- When swallowed, it causes a complete loss of voice and verbal capabilities for 1-6 hours. This effect only becomes apparent after swallowing; a drop on the tongue gives no clue.
- Players whose characters drink it are barred from verbal communication with other players (no grunts or groans), only able to communicate via nods, hand signals, etc.
- If the group’s “caller” is affected, another player must take their place.
- Written communication is only possible if the muted player has an Intelligence of 14+, and the message can only be read by another character with similar Intelligence.
Monster:
- 2 Stirges: (HP 1-4 each, AC 7, MV 30′ (fly 90′), ATK 1, DMG 1-3, special: drain blood after successful hit for 1-4 HP per round). These small, winged bloodsuckers could be clinging to the ceiling, ready to dart down at any warm-blooded creature entering the room, especially if they are thirsty or drawn to the fish.
Treasure & Location:
- Hidden beneath a pile of river stones at the bottom of the Fish Pool (Pool K – requires scooping out stones): A small, water-worn wooden box (unlocked) containing 10 copper pieces (c.p.) and a few shiny, non-precious pebbles.
32. Advisor’s Chamber
What the GM can reveal immediately:
- Access to this chamber is only through a secret door on its west wall, which leads to the Room of Pools (31).
- The room’s decor is pleasant but uninspired.
- The most striking feature is the floor, which continues the golden-brown, white, and black mosaic tile patterns seen in the adjacent Room of Pools.
- Minimal furnishings include a common bed, three chairs, a battered old table, and a makeshift desk with a single, locked drawer.
- The walls are barren rock, except for a framed picture hanging over the desk. It depicts two figures: an impressive warrior and a wizened magic-user in a purple robe.
What players need to investigate:
- Framed Painting: This is a full-color, beautifully rendered painting.
- In one corner, in Elvish, are the words: “To wise Marevak, worthy advisor and counselor, from a grateful Zelligar and Rogahn.” These words are readable only by those who know Elvish or through a read languages spell.
- The signed names Zelligar and Rogahn are apparent upon close examination.
- In another corner is the signed name Tuflor (the artist), a fact not obvious without deduction or asking around in civilization.
- The painting is large, bulky, and heavy when removed. If carried undamaged to civilization, it can fetch up to 300 g.p.
- However, selling it carries a 60% risk that the purchaser will recognize its origin, potentially causing problems for the seller if word spreads.
- Desk: Mostly empty, except for several attached sheets of notes written in Elvish.
- The first sheet is titled “Suggestions for the Further Development of Quasqueton” and details stronghold construction (no information to assist adventurers, no maps).
- The document is signed on each page by Marevok.
- Locked Desk Drawer: Well-secured.
- Tampering (except for a successful “remove trap” by a thief) releases a terrible gaseous emission that drives all characters from the room for 1-4 hours (no saving throw, occurs only once).
- A thief can attempt to pick the lock at their normal chances, but only one try can be made; if they fail, that character cannot open the lock.
- The desk can be dismantled with heavy blows from a weapon. This will create noise, requiring an extra check for wandering monsters.
- Contents of the drawer (roll 1d12):
- Potion of Levitation
- Elven Boots
- 10-100 g.p.
- A 50 g.p. gem (moonstone)
- A golden medallion worth 20 g.p.
- Read Languages scroll
- Web scroll
- Cursed scroll (permanently removes 1 point from Charisma of the first person to read it; remove curse spell will not counteract it).
- Ring of Protection +1
- Potion of Healing (two doses)
- A Dagger +1 with ornately carved handle
- Nothing
Monster:
- 1 Gelatinous Cube (HP 4d4, AC 8, MV 15′, ATK 1, DMG 2-8 + paralyze). This creature silently cleans dungeon floors and could be perfectly camouflaged against the mosaic tiles. It moves slowly but can completely engulf a surprised party member. It will only be noticed if someone walks into its square or actively detects invisible creatures.
Treasure & Location:
- Over the desk: Framed painting (worth 300 g.p. but with risks).
- Inside the locked desk drawer: One random item from the 1d12 table (see above).
33. Barracks
What the GM can reveal immediately:
- This large, open room served as the dwelling place for the stronghold’s guards and men-at-arms, most of whom left with Rogahn and Zelligar.
- Approximately 40 common beds are scattered throughout the room, along with about half that number of chairs and stools.
- Several large wooden tables are along various walls.
- At the south wall is a large wooden chest of drawers.
- In the southwest corner, the floor slants steeply toward the wall, leading to an opening too small for access. A faint smell indicates it’s a crude toilet area.
- The walls are rough stone, with wall sconces for torches and various pegs.
- Goblin Activity: The barracks reek even more than usual. Four goblins are passed out cold on several beds, snoring loudly amidst empty wineskins. Another goblins is precariously balanced on a stool, attempting to nail a tattered piece of cloth (perhaps a banner?) to the ceiling with a rock.
What players need to investigate:
- Goblins: The sleeping goblins are oblivious unless loudly disturbed. The one on the stool is very clumsy (-4 to Dexterity saves) and could easily fall. They are all too drunk to fight effectively if roused.
- Chest of Drawers: Empty except for a few old socks, common footwear, a few cloth vestments, and other similar items of no special value.
- Pegs on the Wall: Some odds and ends hang here: an old battered shield, an empty canteen, a 20′ section of light chain, a sheathed sword (old and rusty), and a bearskin.
Monster:
- 5 Drunk Goblins (HP 3-6 each, AC 9, MV 10′ (if awake), ATK 1, DMG 1-6 with crude weapons, -4 to hit).
- 3 Giant Rats (HP 1-2 each, AC 7, MV 30′, ATK 1, DMG 1-3 + disease). These rats, having long since claimed the deserted barracks as their own, might scurry from beneath beds or out of the crude toilet area if disturbed. They might even try to gnaw on the sleeping goblins’ ears if the PCs aren’t careful.
Treasure & Location:
- Behind a loose stone in the crude toilet area (requires a successful Search roll DC 14): A small, grimy leather coin purse containing 14 s.p. and 2 copper pieces.
- Hidden in the hollow leg of one of the stools (requires examination of each stool): A single, well-worn silver ring (worth 5 g.p.).
- On the person of the goblins: Each carries 1d4 copper pieces.
34. Armory
What the GM can reveal immediately:
- This irregularly-shaped room was designed to house the stronghold’s arms supply but is mostly empty now.
- When the room is entered, a slight whistling sound can be heard if adventurers are quiet.
- If the door is closed (it will automatically close one round after everyone enters unless spiked open, and even then, there’s a 50% chance it will close) and the second exit is also closed, a howling wind will immediately result.
- This wind has an 80% chance of extinguishing any torch and a 50% chance of extinguishing each lantern carried.
- The wind ceases when either or both exits are opened.
- Examination of the ceiling (20′ high) reveals two sizable vents (no usable access), indicating a natural, not magical, phenomenon.
- The rock walls are mostly smooth, with carved ledges and numerous wooden pegs.
- Some items remain on the wall: a number of battered shields (several broken), bits of body armor (all in poor condition), several crude bows (-2 “to hit” if used), a quiver of normal arrows, two swords (one in good condition), a dozen spears, two hand axes (one with a split handle), a flail, a two-handed sword with a broken blade, and a dagger.
What players need to investigate:
- Weapons on Wall: The flail, the dagger, and the one sword in good condition seem usable and of normal value. The rest are damaged or unusable as described.
- Locked Chests: In the extreme southwest corner are two large, bulky, and heavy locked chests. Both are empty.
Monster:
- 1 Animated Armor (Suit of Full Plate): (HP 30, AC 2, MV 60′, ATK 1, DMG 1-8). This spectral guardian could be standing silently amongst the other battered armor, indistinguishable until it attacks. It is a formidable opponent.
Treasure & Location:
- Among the “bits and pieces of body armor” (requires careful sifting through the junk): A small pouch containing 10 g.p. that was overlooked.
- Concealed inside the hilt of the one good sword (requires disassembling the hilt): A tiny, perfectly cut diamond (worth 100 g.p.).
35. Guest Chamber
What the GM can reveal immediately:
- There are three identical guest chambers side by side, all opening into the same corridor.
- All rooms are similarly furnished with rough rock walls and minimal furnishings: a wooden bed, a small table, and a single chair.
- The middle chamber differs: it has a false door on its eastern wall.
What players need to investigate:
- False Door (Middle Chamber): It seems to move like a normal door but resists opening. If battered down, it only reveals a stone wall behind it.
Monster:
- 1 Shadow (HP 12, AC 7, MV 120′, ATK 1, DMG 1-4 Strength drain). This creature could be lurking in the shadowed corners of one of the guest chambers, especially the middle one, preying on unwary visitors. It’s difficult to hit with non-magical weapons.
Treasure & Location:
- Under the mattress of the bed in the easternmost guest chamber (requires lifting/removing mattress): A small, flat wooden box (unlocked) containing 10 s.p. and 3 old, unpolished silver buttons (worth 1 s.p. each).
- Behind a loose stone in the wall behind the false door in the middle guest chamber (requires discovering the false door and then searching beyond it): A hidden compartment containing 1 small, unholy symbol (worth 5 g.p., perhaps to a collector) and a dusty, empty leather wallet.
36. Utility Room
What the GM can reveal immediately:
- This extra room is empty and unused.
What players need to investigate:
- False Steps (Corridor North of Room): The corridor leading past the guest chambers has an unnoticeable upward slant to casual adventurers (Dwarves have a 2 in 6 chance to notice). The 8 stairs then lead downward, creating the impression of a descent to another level, but it’s only an illusion of depth.
- Pit Trap (East of Room):
- Just to the east of this room, the corridor ends in a dead end with a false door on the north wall.
- When any adventurer approaches the false door (within 5′), their weight triggers the trap.
- The entire 20′ section of floor between the false door and the opposite wall opens up, a giant crack appearing in the center as the middle drops and sides slant inward.
- All characters and their equipment fall through the 4′ wide opening to a pool of cold spring water 40′ below in Room 50 of the lower level.
- Falling characters sustain 1-4 hit points of damage upon hitting the water.
- The pool is ~8′ deep. Heavily encumbered characters (more than 50 coins weight equivalent) risk drowning unless they unencumber themselves after landing.
- Heavily encumbered characters who don’t unencumber have a 90% chance of drowning, modified by -5% per point of Dexterity (e.g., Dex 12 = 30% chance).
- Items dropped are retrievable, but the water is extremely cold. A Constitution check (5% chance per point of Con) determines if a character can withstand the cold to dive effectively.
- Only one item can be retrieved per dive, each dive takes one round, with two rounds needed for air between dives.
- No character can stay in the water for more than ten rounds. One hour of rest and recovery is needed after each diving session.
- The trap closes after being triggered and resets. Adventurers landing here should be placed in Room 50 on the lower level map.
Monster:
- A Giant Lizard (HP 15-20, AC 5, MV 60′, ATK 1, DMG 1-6) could be lurking in the pit trap at the bottom of the fall, preying on those who tumble down.
Treasure & Location:
- At the bottom of the pit trap in Room 50 (from previous victims): Scattered amidst the cold water, 1d6 g.p. and 1d4 small, mundane trinkets (e.g., rusty buckle, broken comb).
37. Recreation Room
What the GM can reveal immediately:
- This room is designed for recreation and training, specifically for Rogahn.
- The carved door is heavy and thick, bearing a fancy “R” on its outer face.
- The east and west walls are covered with pocked wood and have large archery targets. Six arrows are still stuck in the eastern target.
- Several quivers of arrows are around, but there are no bows in the room.
- In one corner, there are several iron bars of varying length, weight, and circumference, apparently designed for weight lifting.
- In another corner, a metal bar is attached to two walls about 7′ off the floor.
- Nearby, a rope is suspended from the ceiling 20′ above.
- Aside from two heavy benches and a single stool, the only other furnishings are five heavy woven mats lying atop each other to form a 20’x20′ floor cushion.
- Hanging on the wall are several very heavy weapons (a notched sword, a battle axe, a flail, and a mace) which appear normal but weigh almost double normal weight.
- Leaning against the wall are two heavily battered shields.
What players need to investigate:
- Bows: The lack of bows despite the arrows and targets might prompt a search for them elsewhere.
- Heavy Weapons: The unusually heavy weapons are for training purposes; they are not magical and their extra weight makes them difficult to wield effectively in combat.
- Iron Bars: These are indeed for weight lifting.
- Rope and Metal Bar: These indicate a place for physical training or acrobatics.
Monster:
- 1 Gargoyle (HP 20-30, AC 5, MV 90′ (Fly 120′), ATK 2, DMG 1-3/1-6). It could be perched silently on the ceiling near the suspended rope or metal bar, disguised as a carved architectural feature, striking when the party is distracted by the training equipment.
Treasure & Location:
- Hidden beneath the bottommost woven mat (requires moving all mats): A small, concealed compartment containing a worn leather bracer (non-magical) and a small, intricately carved wooden whistle (worth 5 g.p.).
- Inside a hollow section of one of the heavy benches (requires checking each bench): A rusty, small iron box (unlocked) containing 10 s.p. and a few dried, stale berries.
Key to the Lower Level
General Description (GM Notes): The lower level of the complex is significantly rougher and more unfinished than the upper level. Walls are irregular and coarse, unlike the more refined upper-level construction (with the exception of two noted rooms on this level that possess a greater degree of completion). Corridors are approximately 10 feet wide, irregular, and rough, making mapping challenging. Floors are uneven, often covered with rock chips and debris. Doors are similar to the upper level, but secret doors here are either carved from rock or cleverly disguised by it to appear unnoticeable.
38. Access Room
What the GM can reveal immediately:
- This room is clearly an old mining staging area, filled with piles of rock and rubble.
- Various mining equipment is scattered about: rock carts, mining jacks, rough-hewn timbers, and pickaxes.
- It’s apparent that no mining activity has taken place here for a long time; dust and cobwebs cover everything.
What players need to investigate:
- The mining equipment is old and mostly in disrepair, not useful for active mining. However, some pieces might be adapted for other uses (e.g., timbers for shoring, pickaxes as improvised weapons if desperate).
Monster:
- A Giant Centipede (HP 1-2, AC 9, MV 20′, ATK 1, DMG Poison) could be lurking under a pile of loose rubble, scuttling out to bite if disturbed. Its venom is non-lethal but can cause temporary paralysis.
Treasure & Location:
- Hidden beneath a loose timber near the furthest rock cart (requires a successful Search roll DC 13): A small, rust-pitted iron strongbox (locked, requiring a successful Open Locks check DC 15 or forced open with noise) containing 8 silver pieces and a miner’s rough-cut sapphire (worth 25 g.p.).
39. Museum
What the GM can reveal immediately:
- This room appears to be an unfinished museum, intended as a monument to the stronghold’s most illustrious inhabitants.
- The west wall features a sectioned fresco depicting various events from Rogahn’s life: a young boy raising a sword, a young man slaying a wild boar, a warrior carrying off a dead barbarian, and a hero hacking barbarian foes to pieces in a large battle.
- The east wall has a similar sectioned fresco showing cameos from Zelligar’s life: a boy gazing at a starry night sky, a young man diligently studying a great tome, an earnest magician changing water to wine for an audience, and a powerful wizard casting a death fog over an enemy army from a hilltop.
- The north wall section is unfinished, but several fresco sections show Rogahn and Zelligar together: shaking hands in younger days, winning a great battle against barbarians in a hill pass, and gazing upward from the wilderness at a craggy rock outcropping (recognizable as the stronghold’s location). A fourth space is blank.
- Next to the frescoes are other mementoes: a parchment letter of thanks (from a prominent landowner for help in the barbarian war), a barbarian curved sword, and a skeleton of the barbarian chief (identified by a Common language wall plaque).
- More blank space on the wall suggests further additions were planned.
What players need to investigate:
- Frescoes: These are painted directly onto the wall and cannot be removed.
- Mementoes: None of the mementoes (letter, sword, skeleton) are of any particular worth or value beyond their historical context. The letter confirms alliances Rogahn and Zelligar made.
Monster:
- 2 Giant Spiders (HP 5-10 each, AC 7, MV 60′, ATK 1, DMG 1-3 + Poison). These spiders have built extensive, almost invisible webs in the upper corners and across the unfinished sections of the north wall, waiting for unsuspecting prey to wander into their museum.
Treasure & Location:
- Concealed within the base of the “barbarian chief’s skeleton” (requires careful dislodging of bones and a successful Search roll DC 15): A small, smooth river stone that is actually a polished moonstone (worth 50 g.p.).
- Tucked behind the barbarian curved sword on the wall (requires removing the sword): A small, tightly rolled scroll containing a map of a nearby, uncharted wilderness area (no immediate game value but could inspire future adventures).
40. Secret Cavern
What the GM can reveal immediately:
- This cavern, characterized by rough, irregular walls and an uneven floor, appears to be a natural formation.
- There are no furnishings or obvious features within it.
What players need to investigate:
- This cavern is empty and appears to be just a natural space.
Monster:
- 1 Grey Ooze (HP 18, AC 8, MV 10′, ATK 1, DMG 2-8 + corrosion). Perfectly camouflaged against the rough, damp stone, this ooze will silently attack anyone who enters its space, dissolving metal and leather on contact.
Treasure & Location:
- Hidden in a small, naturally occurring crevice high on the north wall (requires climbing or a long pole to reach, successful Search roll DC 16): A pouch made of cured monster hide containing 10 g.p. and a small, unpolished agate (worth 10 g.p.).
41. Cavern
What the GM can reveal immediately:
- This is another natural cavern, with rough, uneven walls and floor strewn with rock chips. It seems empty.
What players need to investigate:
- The cavern appears to be empty and unremarkable.
Monster:
- 2 Carrion Crawlers (HP 12 each, AC 7, MV 40′, ATK 8, DMG paralysis by tentacles). These vile scavengers might be clinging to the high ceiling, dropping down onto unsuspecting prey, or scuttling from behind a large rock formation. They are drawn by the scent of any lingering organic matter.
Treasure & Location:
- Partially buried under a large, oddly shaped rock near the center of the cavern (requires moving the rock and a successful Search roll DC 12): A rust-encrusted iron helmet (worthless) with a small, hollowed-out section that contains a single silver piece and a dried, brittle flower (no value).
42. Webbed Cave
What the GM can reveal immediately:
- The entrance to this room is completely covered with silky but sticky webs.
- Beyond the webs, the cavern is dark and silent.
What players need to investigate:
- The webs must be cut or burned through to gain access. (Refer to web spell details for mechanical effects, e.g., flammable, sticky, difficult to cut).
Monster:
- 1 Large Spider (HP 5-10, AC 7, MV 60′, ATK 1, DMG 1-3 + poison) is the creator of these webs and its guardian. It will immediately attack any creature attempting to breach its lair.
- 1 Giant Centipede (HP 1-2, AC 9, MV 20′, ATK 1, DMG Poison) could also be scuttling in the shadows, attracted to the vibrations in the webs, acting as a secondary threat.
Treasure & Location:
- Caught in the very center of the webs (requires careful extraction without disturbing the spider or getting too entangled): A small, waterlogged leather pouch containing 2 electrum pieces and a petrified bat skull (worth 1 g.p. to a morbid collector).
- Deep within a narrow crevice at the back of the cave, almost entirely obscured by a particularly thick patch of webs (requires significant effort to clear and a successful Search roll DC 16): A small, tarnished bronze box (unlocked) containing 10 g.p. and a scroll with a single Web spell (matching the cave’s theme).
43. Cavern
What the GM can reveal immediately:
- This cavern is a typical rough, unfinished natural space with uneven floors and debris. It seems empty.
What players need to investigate:
- The cavern appears to be empty and unremarkable.
Monster:
- 1 Giant Frog (HP 2-6, AC 7, MV 30′, ATK 1, DMG 1-4 + special: swallow smaller creatures, tongue attack). This creature could be lurking in a damp, shadowed corner, waiting for a meal. It might have a large, partially digested insect or small animal in its gullet.
Treasure & Location:
- Stuck in a muddy patch near the cavern’s lowest point (requires searching the ground carefully): A single silver ring (worth 5 g.p.) with a simple, unadorned band.
- Protruding from a small pile of loose rocks against the north wall (requires moving the rocks): The hollowed-out bone of a large animal, inside of which is a tightly folded, blank piece of parchment.
44. Cavern
What the GM can reveal immediately:
- This cavern is another example of the lower level’s unfinished nature, with rough walls and floor. It appears to be empty.
What players need to investigate:
- The cavern appears to be empty and unremarkable.
Monster:
- 2 Giant Beetles (boring beetles) (HP 3-6 each, AC 4, MV 30′, ATK 1, DMG 2-8). These large insects might be slowly boring through a section of softer rock, their chitinous shells blending with the stone. They will be aggressive if disturbed.
Treasure & Location:
- Lodged in a high, narrow fissure in the ceiling (requires careful climbing or a pole, successful Search DC 15): A small, tightly bound package wrapped in oiled cloth, containing 3 torches and a small bag of dry kindling (useful survival supplies).
- Partially revealed by a recent rockfall near the west wall (requires moving some debris): A rusty, broken pickaxe head.
45. Cavern of the Mystical Stone
What the GM can reveal immediately:
- This antechamber contains a large, glowing chunk of rock resembling mica, permanently resting in place.
- The stone radiates magic strongly.
What players need to investigate:
- Mystical Stone:
- It cannot be removed.
- Chips can be broken off by hand, but only one chip at a time. The rest of the rock becomes impervious until the broken chip is dealt with.
- Once a chip is removed, its glow fades, becoming a normal piece of mica with no magical properties after three rounds (30 seconds), or if removed from the room.
- The chip’s magical properties manifest only if consumed (or placed in the mouth) within three rounds of being broken off.
- Each individual can only be affected once by the stone, even on future visits.
- Effect of consuming a chip (roll 1d20):
- Immediately teleports the character and their gear to the Webbed Cave (room 42).
- Immediately blinds the character for 1-6 hours (no combat, must be led).
- Raises Strength rating permanently by 1 point.
- Raises Charisma rating permanently by 1 point.
- Raises Wisdom rating permanently by 1 point.
- Raises Intelligence rating permanently by 1 point.
- Raises Dexterity rating permanently by 1 point.
- Lowers Strength rating permanently by 1 point.
- Lowers Charisma rating permanently by 1 point.
- Lowers Intelligence rating permanently by 1 point.
- Cures all damage on one character.
- Causes invisibility for 1-6 hours (subject to normal restrictions).
- Poison (saving throw at +1).
- Makes a 500 g.p. gem (pearl) appear in character’s hand.
- Gives a permanent +1 to any single weapon carried by character (if multiple, roll randomly).
- Heals all lost hit points of character (if any).
- Causes idiocy for 1-4 hours (unable to function intelligently or fight, must be led).
- Gives a special one-time bonus of 1-6 hit points to the character (first ones lost next time damage is taken).
- Gives a curse: character sleeps 72 hours straight each month (beginning one day before and ending one day after each new moon, removable only by remove curse).
- Has no effect.
Monster:
- 1 Gargoyle (HP 20-30, AC 5, MV 90′ (Fly 120′), ATK 2, DMG 1-3/1-6). This creature could be disguised as a rough, unworked stone protrusion on the ceiling or wall, observing those who approach the mystical stone. It will attack if anyone attempts to take or consume chips.
Treasure & Location:
- The Mystical Stone itself is the treasure, providing various magical effects. The 500 g.p. pearl and +1 weapon are also direct results of its power. No other static treasure exists here.
46. Sunken Cavern
What the GM can reveal immediately:
- This small cavern lies at the bottom of a short, sloping corridor.
- The walls are wet with moisture and glisten in any reflected light.
What players need to investigate:
- The dampness is natural and doesn’t appear to be harmful.
Monster:
- 1 Giant Crab (HP 10-15, AC 4, MV 30′, ATK 2, DMG 2-8/2-8). This large, aggressive crustacean could be lurking in a small, water-filled depression at the very bottom of the slope, blending with the wet rock, ready to snap at intruders.
Treasure & Location:
- Beneath a thin layer of fine silt at the very bottom of the sloping floor (requires sifting through the silt): A small, water-resistant pouch containing 18 g.p. and a perfectly preserved, small seashell (worth 1 g.p. for its unusual deep-dungeon location).
47. Cavern
What the GM can reveal immediately:
- This is another natural cavern, with rough, uneven walls and floor strewn with rock chips. It seems empty.
What players need to investigate:
- The cavern appears to be empty and unremarkable.
Monster:
- 1 Rust Monster (HP 15, AC 2, MV 40′, ATK 2, DMG Special). This creature, drawn by the faint metallic tang from the upper levels or perhaps old mining equipment, could be subtly camouflaged against a rusted patch of rock. It will immediately target any metal items carried by the adventurers.
Treasure & Location:
- In a small, naturally formed alcove high on the east wall (requires climbing or a successful Search DC 15): A mummified, dried-out small bat carcass and a tarnished silver amulet (worth 10 g.p., but otherwise mundane).
48. Arena Cavern
What the GM can reveal immediately:
- This cavern is designed as a small theatre or arena, but it is unfinished.
- The center portion of the room is sunken about 15 feet below the floor level.
- The sides slope downward from the surrounding walls, forming a small amphitheater.
- Goblin Activity: A raucous roar echoes from within! You hear shouts and crashes. Descending into the arena, you see a truly chaotic scene. About eight goblins are engaged in a drunken, disorganized brawl in the sunken pit, swinging wildly at each other with fists and scavenged items. Two other goblins are desperately trying to climb the sloping sides, slipping and tumbling back down with loud grunts and giggles.
What players need to investigate:
- The area is clearly designed for spectacles or training, but its unfinished state suggests it was never fully utilized.
- Goblins: These goblins are heavily intoxicated and focused entirely on their brawl. They have a -4 penalty to AC and attack rolls, and are highly susceptible to surprise. Their fighting is more entertaining than effective, but a stray blow could still land. They might mistake the PCs for more brawlers or a new audience.
Monster:
- 10 Drunk Goblins (HP 3-6 each, AC 9, MV 20′, ATK 1, DMG 1-6 with crude weapons, -4 to hit).
- 2 Gnolls (HP 5-8 each, AC 5, MV 40′, ATK 1, DMG 2-8). These brutish humanoids, finding their usual lair disturbed by the drunken antics, are hiding in the shadows near the arena entrance, annoyed but perhaps intrigued by the chaos. They will wait for an opportune moment to attack either the goblins or the PCs.
Treasure & Location:
- Buried in a loose pile of sand and gravel at the very bottom of the sunken arena (requires digging and a successful Search DC 13): A heavy, rusty iron chain (20′ long, cumbersome, but usable) and a small leather pouch containing 14 s.p.
- Under a makeshift bench on the upper level (requires lifting the bench): A crude wooden practice sword (worthless) and 3 crossbow bolts (normal).
- On the person of the goblins: Each carries 1d4 copper pieces.
49. Phosphorescent Cave
What the GM can reveal immediately:
- This medium-sized cavern and its irregularly-shaped eastern arm present an eerie sight.
- A soft phosphorescent glow bathes the entire area, independent of other illumination.
- This strange light is caused by a widespread growth of a light purplish mold on the walls, ceiling, and even parts of the floor.
- The mold itself is harmless.
What players need to investigate:
- The mold is purely a source of light and does not react to touch or attempts to harvest it.
Monster:
- 1 Displacer Beast (HP 30-40, AC 4, MV 60′, ATK 2, DMG 2-8/2-8, special: illusionary displacement). This cunning creature might be drawn to the cave’s natural light, allowing it to remain hidden in the shifting shadows created by its displacement ability. It could use the eerie glow to its advantage, ambushing unwary adventurers.
Treasure & Location:
- Hidden in a small, damp crevice behind a particularly large patch of phosphorescent mold in the eastern arm (requires moving the mold, which regrows slowly, and a successful Search DC 16): A small, waterproof leather case containing a delicate, silver-inlaid comb (worth 10 g.p.) and a single, unblemished pearl (worth 100 g.p.).
- Near the mouth of the main cavern, partially obscured by glow-mold, almost entirely covered by fallen rock (requires moving heavy debris): A cracked but ornate ceramic pot (worth 2 g.p.).
50. Water Pit
What the GM can reveal immediately:
- This room contains an 8-foot deep pool of extremely cold water, which is where unwary adventurers fall from the trap on the upper level (Room 36).
- Anyone entering the water (voluntarily or not) must spend a full hour recovering from its chilly effects.
- The pool is about 20 feet across and is fed by a cold spring.
What players need to investigate:
- Cold Water Effects: Beyond the recovery time, characters heavily encumbered (more than 50 coins weight equivalent) risk drowning if they don’t unencumber themselves. A 90% chance of drowning, modified by -5% per point of Dexterity.
- Retrieving Items: Items dropped to the bottom are retrievable, but the water is extremely cold. A Constitution check (5% chance per point of Con) determines if a character can withstand the cold to dive effectively. Only one item per dive, each dive takes one round, two rounds for air between dives. No character can stay in the water for more than ten rounds. One hour rest and recovery needed after each diving session.
Monster:
- 1 Water Weird (HP 18, AC 4, MV 120′, ATK 1, DMG 1-8 + special: drown). This elemental creature, tied to the spring, could be lurking invisibly within the cold water, attacking anyone who enters or attempts to retrieve items, dragging them to the bottom.
Treasure & Location:
- Scattered at the bottom of the pool (from previous victims of the trap): 1d6 gold pieces, 2d4 silver pieces, and a waterproof scroll case containing a soggy but still legible Charm Person scroll.
51. Side Cavern
What the GM can reveal immediately:
- This cavern is unusual only because its eastern rock wall is striated with irregular diagonal streaks of a bluish ore.
- The ore is of no unusual use or value.
What players need to investigate:
- The ore is merely decorative and doesn’t hold any special properties or value.
Monster:
- 1 Grick (HP 19, AC 5, MV 30′, ATK 4, DMG 1-3 each). This serpentine, rock-like predator, camouflaged against the cavern walls, could be waiting patiently in a shadowed crevice near the blue ore streaks, ambushing anything that passes.
Treasure & Location:
- Tucked into a small, deep fissure hidden behind a particularly prominent streak of blue ore (requires a successful Search DC 16): A small, rough-hewn wooden box (unlocked) containing 10 c.p. and a single, unpolished shard of a dark, sparkling crystal (worth 2 g.p.).
52. Raised Cavern
What the GM can reveal immediately:
- This room is accessed by climbing four upward steps from the southeast corner of the Grand Cavern.
- Its eastern wall also shows diagonal streaks of the same bluish ore noticed in Room 51.
- The room has a low ceiling (only 5 feet high), making it difficult for some humans to stand fully erect.
What players need to investigate:
- The low ceiling means larger characters will be constantly stooping, potentially affecting combat or perception checks. The ore is still just decorative.
Monster:
- 1 Stirge (HP 1-4, AC 7, MV 30′ (fly 90′), ATK 1, DMG 1-3, special: drain blood). A single Stirge, attracted by the warmth of intruders, could be clinging to the low ceiling, darting down to feed. The low ceiling could make it harder for adventurers to swat it away.
Treasure & Location:
- Stuck in a small, high crack in the eastern wall, above the ore streaks (requires careful reach and a successful Search DC 14): A small, forgotten leather-bound book of simple, uninteresting poems. Inside, tucked between two pages, is a single, tarnished gold piece.
- Beneath a loose stone in the floor near the entrance steps (requires prying the stone): A small pile of worthless rock chips and a rusty iron nail.
53. Grand Cavern of the Bats
What the GM can reveal immediately:
- This is the largest and most majestic cavern in the complex, with a ceiling almost 60 feet high.
- Primary access is via a corridor sloping downward from the south wall (noticeable even by non-dwarves).
- A secondary entrance/exit is a secret door to the west.
- Steps to the southeast lead up to Room 52.
- A southwestern arm leads to an alcove of unusually shaped rock pillars, forming a meager catacomb.
- During daytime in the outer world, a small opening in the ceiling off the north wall will show daylight. (If time isn’t tracked, there’s a 60% chance of daylight; otherwise, only a 10% chance per adventurer to notice the opening). This inaccessible opening is used by thousands of bats.
- A fluffy and dusty guano covers the floor.
What players need to investigate:
- Bats:
- Thousands of bats live on the ceiling by day and venture out at sunset for feeding. They return as a swarm at dawn.
- This species is very easily agitated.
- Entering with torches or bright light (unshielded lanterns) gives a base 5% chance per light source per turn (10 minutes) of disturbing them and causing them to swarm.
- Noises above subdued conversation add another 10% chance (e.g., 4 torches = 20% chance; 30% if arguing).
- If disturbed, a few bats start, then the mass becomes a giant churning swarm in two melee rounds (20 seconds).
- The swarming bats fill the grand cavern and overflow into adjacent areas/corridors, but those flying out return.
- They buzz and harry persons in the cavern/adjacent corridors, zooming past and occasionally attempting a pinching (harmless) bite (50% chance each round).
- If adventurers leave the grand cavern and remove light sources, the swarm subsides in ~30 minutes. Staying in the room, extinguishing lights, and lying silently for 30 minutes also calms them.
- Fighting swarming bats is hopeless due to numbers. Handheld weapons larger than daggers can hit on an 18, 19, or 20 (with a d20). Bats landing to bite can be hit on a 7 or above. One hit kills a bat.
- Fighting bats makes enough noise for an additional wandering monster roll and causes characters to be automatically surprised if a wandering monster appears.
Monster:
- The Bats are the primary “monster” here, as a dangerous environmental hazard.
- 1 Cave Bear (HP 30-40, AC 6, MV 40′, ATK 3, DMG 2-8/2-8/2-16). This formidable beast could be hibernating or simply sleeping deeply in the alcove of rock pillars, disturbed only by significant noise or intrusion. It would be highly aggressive if awakened.
Treasure & Location:
- Buried shallowly in the guano near the base of one of the large rock pillars in the southwestern alcove (requires digging and a successful Search DC 14): A crude wooden chest (unlocked) containing 1d4 x 100 c.p. (copper pieces, representing lost coins dropped by previous victims or inhabitants).
- Nestled in a hidden cranny high up on the ceiling, almost out of sight (requires very high perception/climbing or flight, successful Search DC 18): A small, water-resistant pouch containing a ring of keys (one of which opens a mundane lock, two others lead to nothing) and a small, unpolished garnet (worth 20 g.p.).
54. Treasure Cave
What the GM can reveal immediately:
- This secret room opens to a corridor shielded by secret doors on either end. It was designed as the stronghold’s hiding place for valuables.
- There is a scattering of gold pieces on the floor.
- Two short human statues, appearing lifelike (as if made from wax), are within the room.
- Goblin Activity: You notice the faint sound of muffled giggling coming from within. Pushing past the secret door, you see one goblin cowering nervously behind one of the “lifelike” statues. He is visibly shaking, clutching a half-eaten, unidentifiable fungus, and occasionally glancing fearfully at the other statue, which seems to be staring directly at him.
What players need to investigate:
- Scattered Gold: There are 11-30 gold pieces (roll 1d20+10) scattered on the floor.
- Locked Chests: Three large, bulky, heavy locked chests are present. They are empty unless the DM decides otherwise for specific plot reasons (noted in text).
- Statues: As soon as any item of value is touched or disturbed, both statues immediately spring to life, draw their swords, and attack the party. These are magical berserkers (HP 4 each, AC 7) who fight to the death and have no treasure on their person.
- Goblin: This goblin is sobered by fear and will attempt to avoid combat. It might try to use the PCs as a shield or diversion to escape. If captured, it might offer to lead them to more “good drink” or “shiny things” to save its skin.
Monster:
- 2 Magical Berserkers (HP 4 each, AC 7). These are the animated statues described above.
- 1 Goblin (HP 3-6, AC 6, MV 30′, ATK 1, DMG 1-6 with crude weapon). This goblin is sober and cowardly.
Treasure & Location:
- On the floor: 11-30 g.p. (1d20+10).
- The locked chests are explicitly empty.
- On the person of the goblin: 1d4 copper pieces.
55. Exit Cave
What the GM can reveal immediately:
- This large cavern is otherwise unremarkable, except for a secret one-way passage out of the stronghold hidden in the northeast corner.
- The secret exit is triggered by pushing a loose rock within the wall.
- The opening allows access for only 10 seconds, then closes, and cannot be triggered again for 24 hours.
What players need to investigate:
- Secret Exit: If used, characters emerge on a 3-foot wide, 20-foot long rock ledge.
- Ropes can be used to rappel down 40 feet to a less steep area, allowing descent through trees and vegetation to the valley below.
- Observing the view reveals they are on the north face of the massive outcropping housing the stronghold (the other entrance is on the south face).
- Returning to civilization or home from this wilderness area might be challenging.
- One-way access: This exit is for egress only. It cannot be triggered from the outside, and a permanent magical spell prevents entry via this opening.
Monster:
- 1 Dire Wolf (HP 15-20, AC 6, MV 120′, ATK 1, DMG 2-8). This large, predatory wolf could be prowling the area near the secret exit on the ledge, perhaps having learned to wait for creatures emerging from the stronghold.
Treasure & Location:
- Tucked into a small, easily missed crevice near the loose rock that triggers the exit (requires a successful Search DC 12): A weather-beaten pouch containing 1d4 + 1 silver pieces and a small, oddly shaped bone charm (no value).
- On the ledge outside the secret exit, partially hidden by fallen debris (requires checking the ledge itself): A rusty, broken lantern and a few charred pieces of wood.
56. Cavern of the Statue
What the GM can reveal immediately:
- In the southern end of this cavern is a solitary stone figure, roughly sculpted from the same black stone as the cavern walls, firmly anchored to the floor.
- The figure is an unfinished human male statue, about 5 feet high, with both arms slightly outstretched, pointing to a jagged rock outcropping that divides two corridors to the north-northeast.
- The statue is too heavy to be moved and resists all attempts to budge or topple it.
What players need to investigate:
- The statue’s pointing gesture is a directional clue, indicating the path to the north-northeast.
- Pit Trap (Just outside this cavern):
- In the corridor leading eastward from this cavern, at the intersection of three corridors, is a large covered pit.
- The pit is about 12 feet across and 10 feet deep.
- Falling into it inflicts 1-4 hit points of damage.
- Characters reaching the area have a 70% chance of falling in (this can be reduced if they are moving cautiously or actively searching, e.g., a 30% chance of noticing the trap).
- If characters in the first rank fall, there’s only a 20% chance of the next row falling, with each checking separately.
- Once sprung, the trap does not re-cover the pit, making it visible.
Monster:
- 1 Basilisk (HP 20-30, AC 4, MV 20′, ATK 1, DMG 1-10, special: petrifying gaze). This creature could be lurking in a shadowy corner near the statue, using its petrifying gaze on anyone who looks at it or the statue for too long. Its presence would explain the unfinished, immobile statue.
Treasure & Location:
- Tucked into a small, easily missed niche in the jagged rock outcropping (where the statue points), accessible only by squeezing into a tight space (requires a successful Search DC 15): A small, tightly bound scroll containing a single Stone to Flesh spell (ironically, perhaps, given the basilisk).
- At the bottom of the pit trap (from previous unlucky travelers): 1d4 copper pieces and a single, rusty iron key (likely for a long-lost, mundane lock).